How the Setup area works
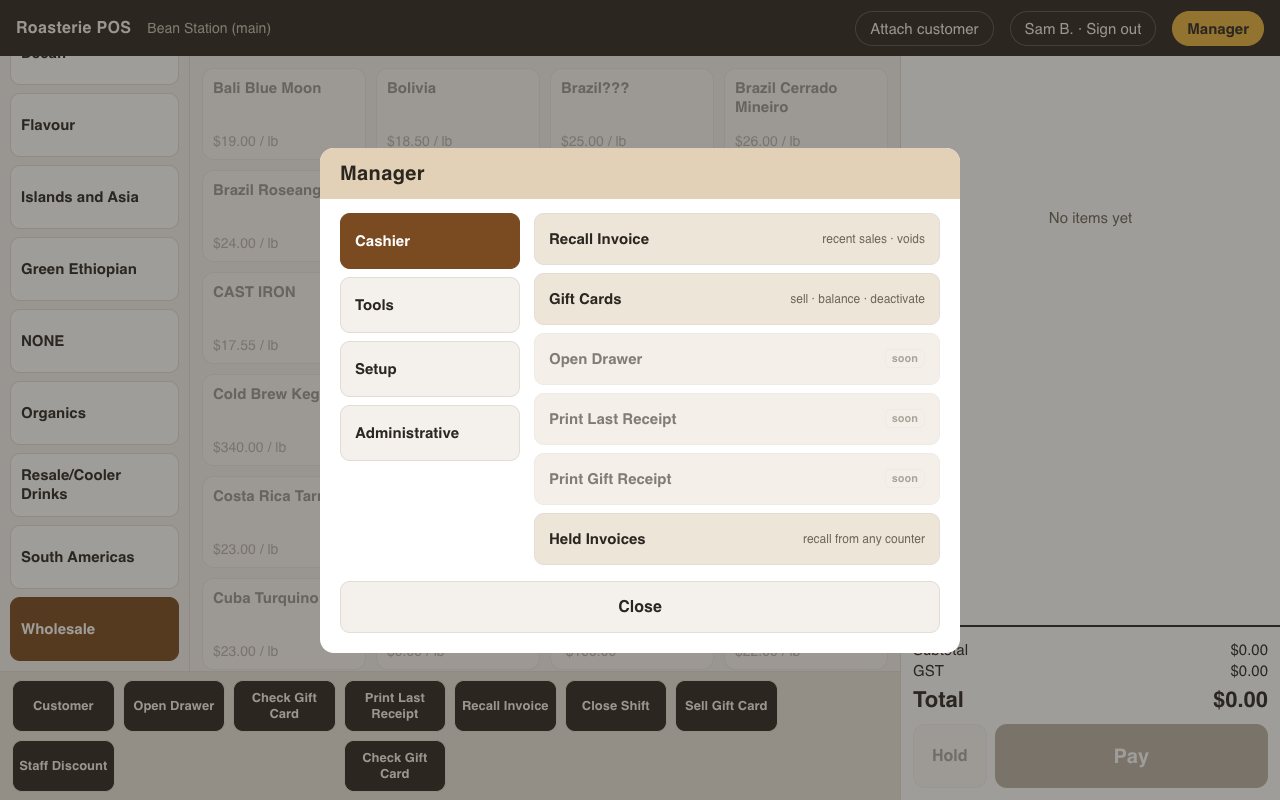
Setup (via the till's Manager button, or #setup) is the administrative side of the
POS — completely separate from ringing sales. The door is real: entering Setup requires
the Enter Setup permission (see permissions.md), and the header shows whose name
the work is recorded under.
The principle: every button on every screen is data. Setup edits that data; the tills just render it.
Menu Layout
Stations & Layouts → pick a station → Edit Touchscreen Layout. Then shape what its sale screen shows:
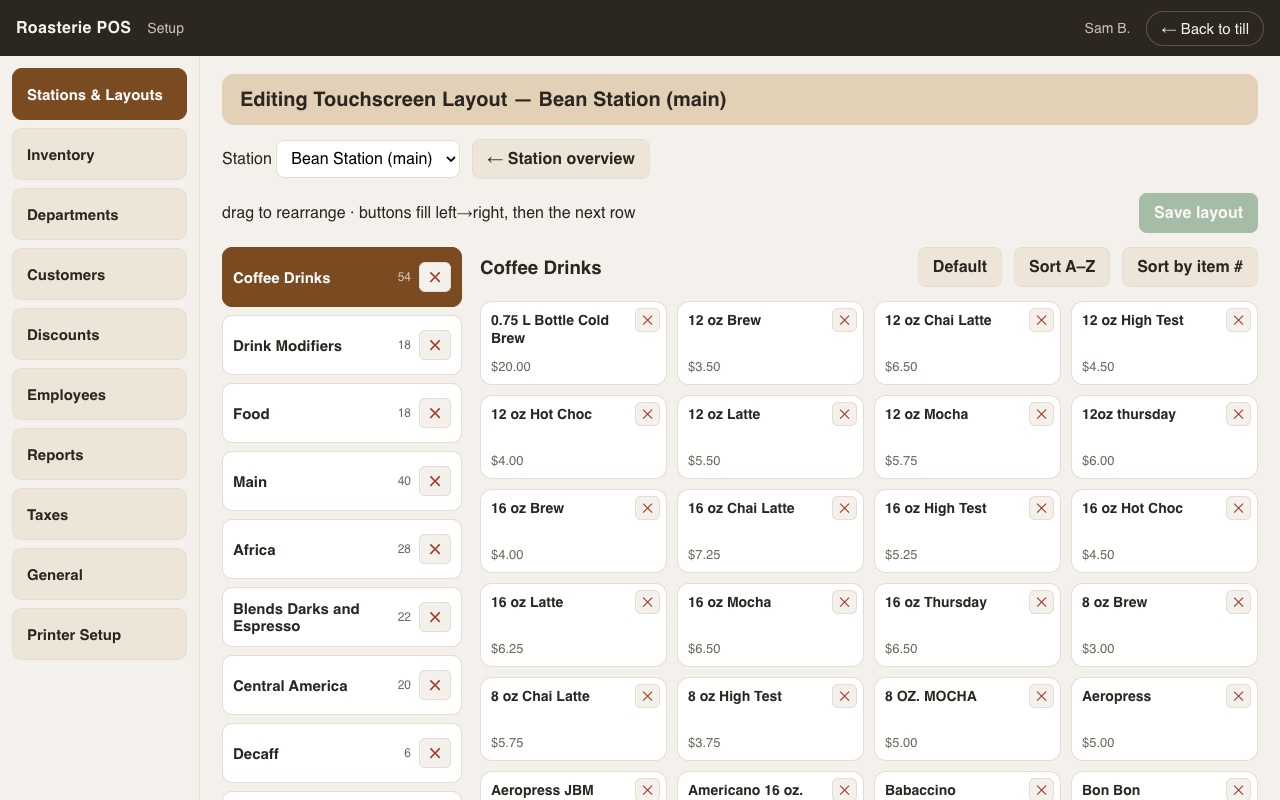
The editor looks like the till: the category column on the left, the real 4-wide button grid on the right. Drag categories or buttons to rearrange — buttons fill left-to-right, then the next row (positions 1·2·3·4 are row one, 5·6·7·8 row two), and sorting or repopulating follows the same reading order.
- ✕ removes a category from the station, or a button from the grid.
- + Add opens a searchable picker of the department's products.
- Default repopulates the grid with every product in the department, A–Z — the recovery button when a menu gets mangled or you want everything back as a starting point.
- Sort A–Z (or by item #) reorders whatever is currently on the grid.
Nothing takes effect until Save layout.
The till loads its curated menu at startup — a product removed here simply doesn't exist on that station's screen (fifteen years of dead items stop cluttering the counter). Modifiers are always attachable regardless of menu placement.
Discounts
The whole discount table. Show at till is the curation flag: the till's discount picker lists only checked rows, no matter how many discounts the table holds. Uncheck Active to retire one entirely (history keeps its records). Every applied discount records who applied it — that's built into the till, not configurable.
Stations
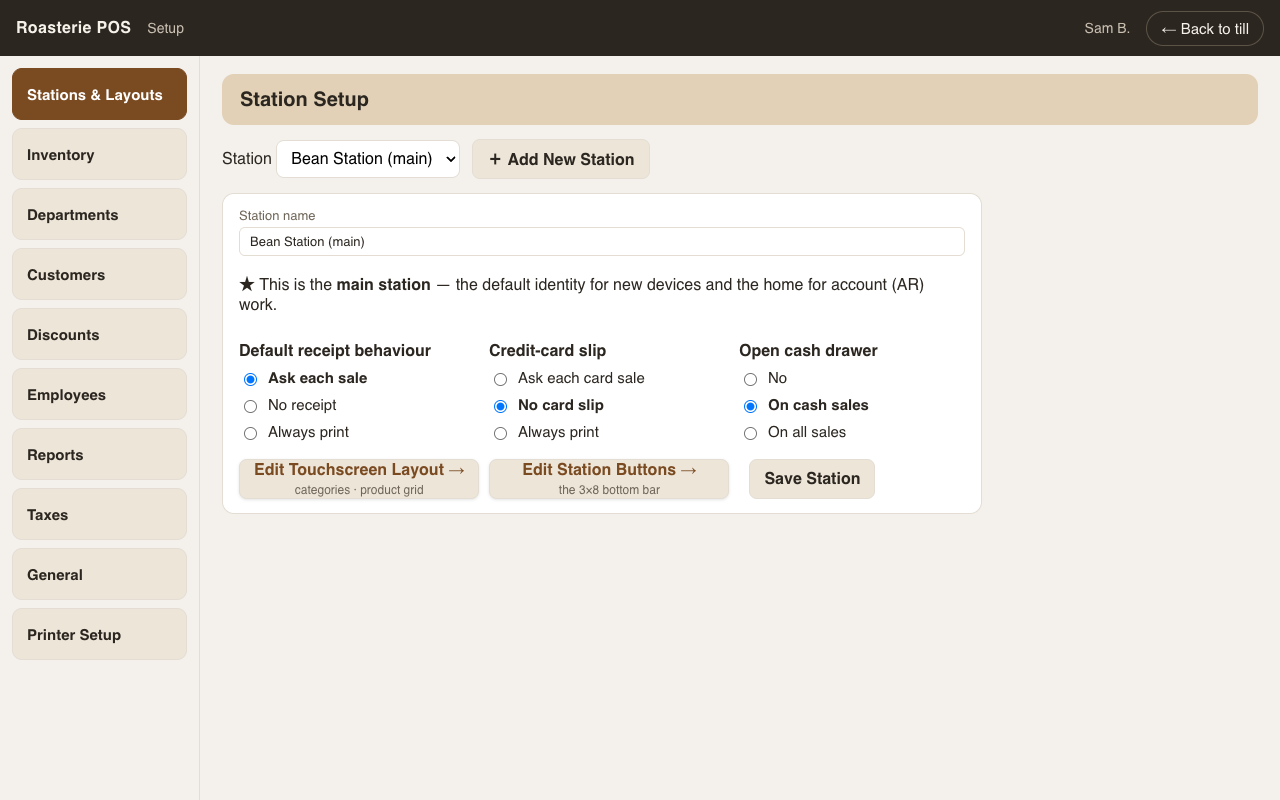
Each till, on one card: its name, its receipt behaviour (ask on every sale / never / always print — with a copy count), the credit-card slip (ask / never / automatic on card payments), and when the drawer kicks open (never / on cash / on everything — the kick itself waits for the device bridge). One station is starred as the main station — the default identity for new devices. From here two editors branch off: Edit Touchscreen Layout (above) and Edit Station Buttons — which system buttons appear along the bottom bar, their order and labels, on a fixed 3×8 grid (blanks are allowed; they group buttons and keep muscle memory). A future mobile cart is just another station with its own trimmed menu.
General
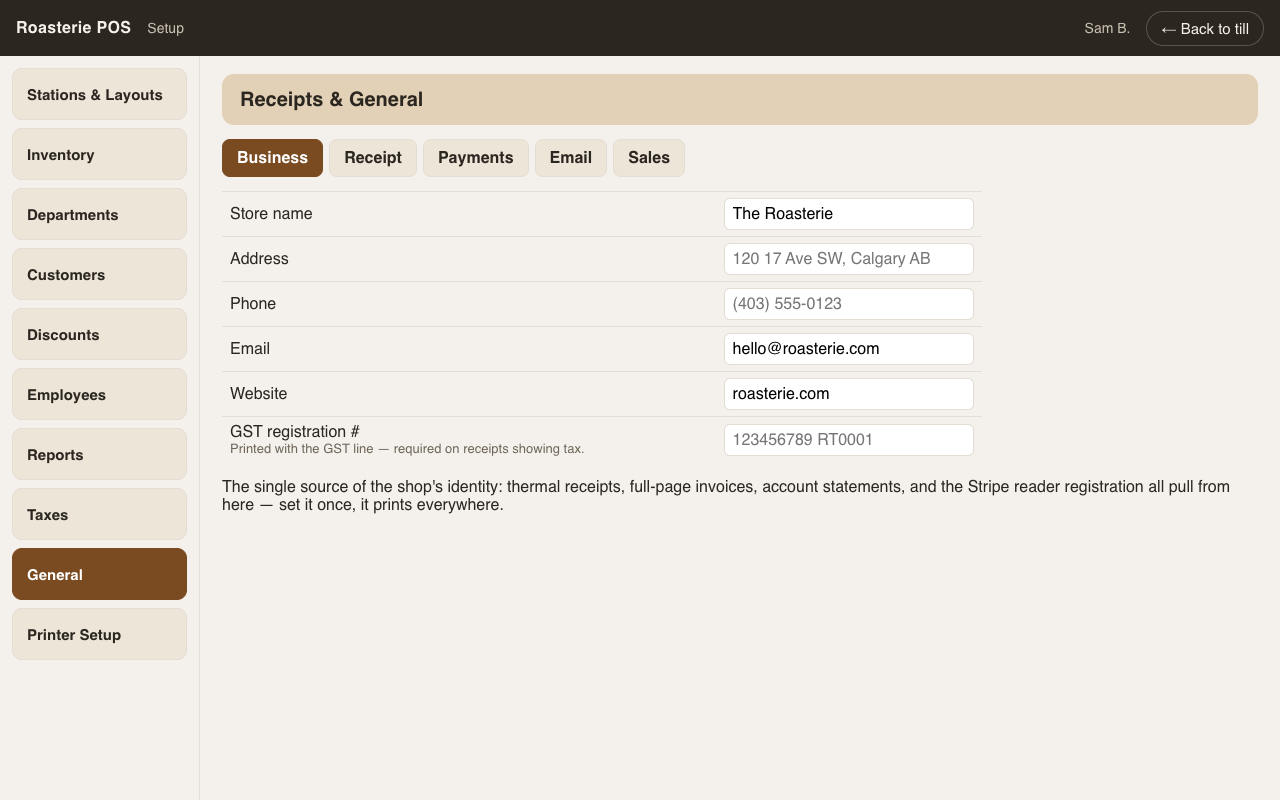
Five tabs, each a small honest form:
- Business — the store identity: name, address, phone, email, website, GST number. This single block feeds receipts, invoices, statements, and the card-reader registration.
- Receipt — logo upload and the header/footer notes, with a live thermal preview
(see
receipts-and-printing.md). - Payments — which card gateway is live (the mock terminal or Stripe Terminal) and
the Stripe secret key, pasted here and stored encrypted — no config files to edit
(see
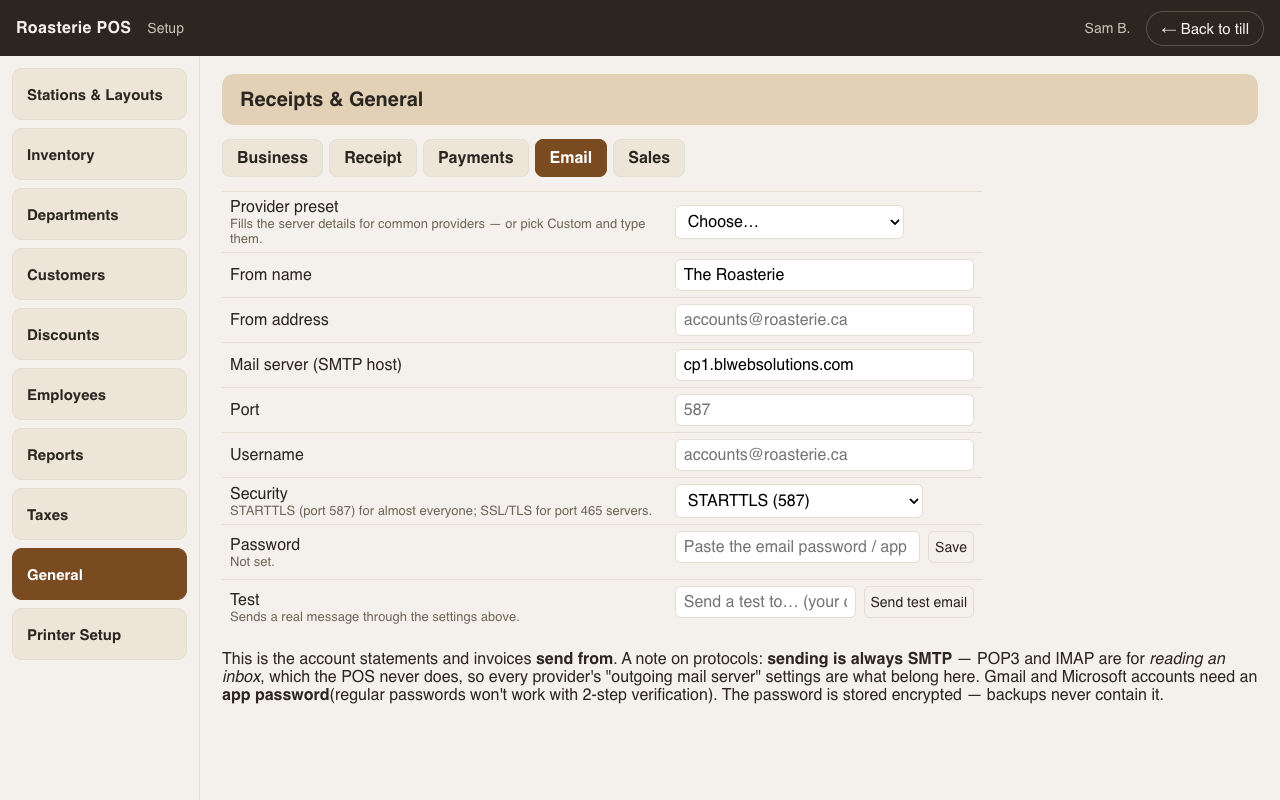
payment-gateway.md). - Email — the SMTP connection for sending mail: a provider preset (Gmail / Microsoft 365 / custom), username, an encrypted password, and a Send test email button that proves the connection. Statement/invoice sending hooks in next.
- Sales — cash rounding: the mode and the increment (nickel and up).
The rest
Each big area has its own page: inventory-maintenance.md, customer-maintenance.md,
customer-accounts.md, reports.md, permissions.md (Employees),
receipts-and-printing.md (Printer Setup), gift-cards.md, vendor-payouts.md,
loyalty.md, backups.md. Taxes are a plain editable table (effective dates handled
underneath); Departments carry the behaviour flags (retail beans vs wholesale vs
drinks) that make new items in them default correctly.